
Authentication and authorization with OIDC and Azure AD on ArgoCD
published at 02-26-2024 by Marten Wick
Implement SSO on ArgoCD via OIDC and AzureAD
OIDC - OpenID Connect
OIDC is an identity protocol that is released in February 2014 and developed by the OpenID foundation where big players like Google and Microsoft are contributors. It is used to identify the user against the requesting system (Relying Party, RP), also called relying party. OIDC is using JWT Web Tokens (JWT) and HTTP-Flows and doesn’t share the credentials with the service.
Because OIDC is build up on OAuth 2.0, it uses several tokens:
- ID-Token
This is the OIDC specific token. It provides claims in JWT format which presents the result of the authentication step and all the information the RP needs to identify a user. - Access token
This is a short living token which is used for the access to specific user resources which are defined in the request to the authorization server. - Refresh token
This is a long live token that can be used to get new access tokens.
In case of using OIDC with Azure AD, the authentication flow looks like this:
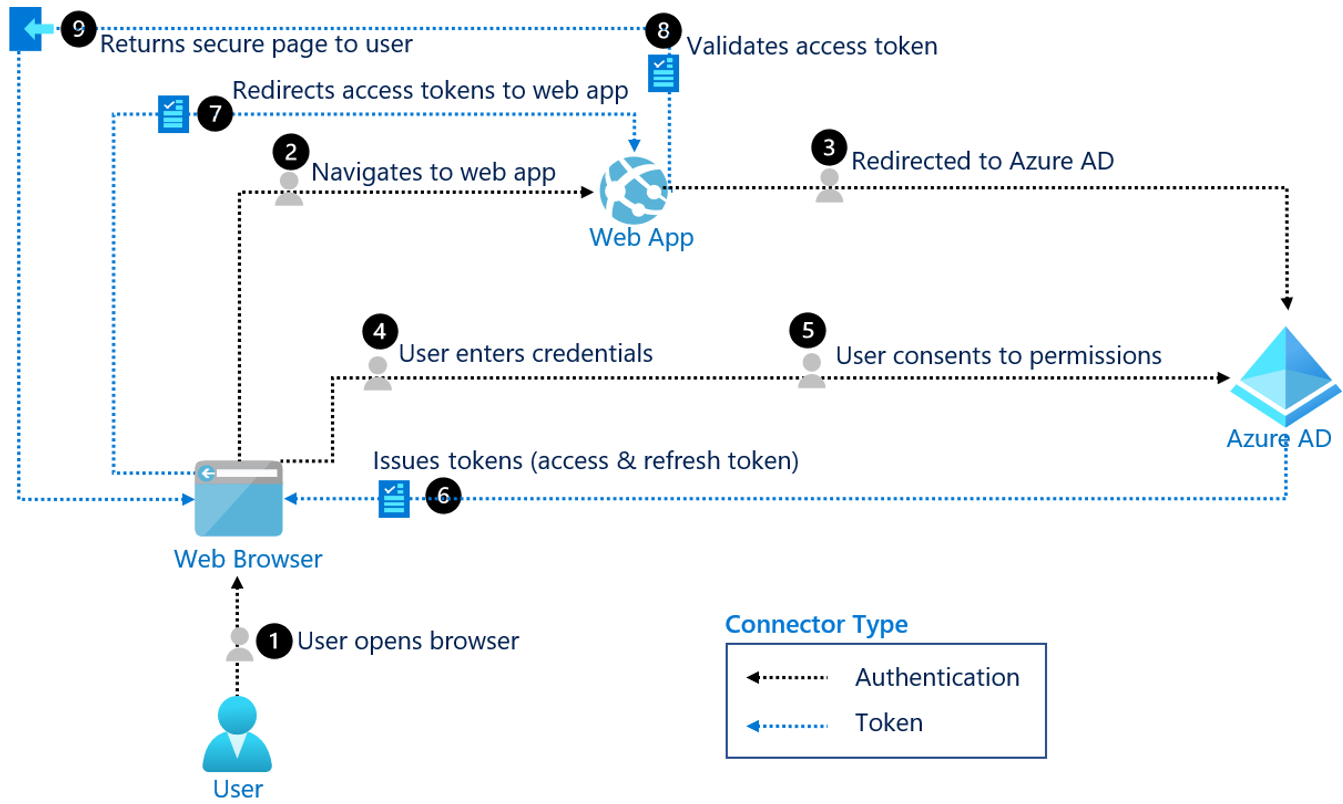
- The user open up a browser and navigates to a web app where he would like to sign in.
- The web app redirects the user to Azure AD that prompts the user to enter his/her credentials.
- He also needs to consent permissions to the web app which can then request the required data to identify the user’s identity. This step only needs to perform once and is persistent until it is removed manually.
- If the permissions are consent and the provided credentials are correct, Azure AD issues an access and refresh token to the web browser session.
- The token is then provided to the web app that grants the user access to the system if the token passes the validation.
ArgoCD OIDC integration
Prerequisites
For this blogpost, we will deploy ArgoCD on an AWS cluster and make use of Azure AD as the OIDC provider. Before we can start the OIDC part, we need to fulfill some prerequisites:
- Installed AWS load balancer controller addon for Kubernetes
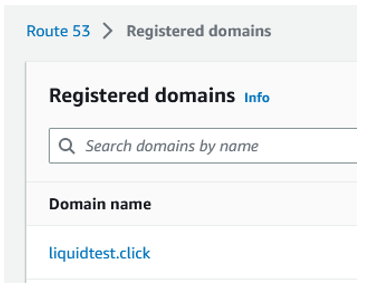
- A registered domain on AWS Route53
- A valid AWS ACM certificate for the registered domain
- ArgoCD Deployment on the AWS cluster
Preparation
To be able to reach ArgoCD via our registered domain, we need to create an Ingress resource that will be linked to an application load balancer created by the Kubernetes AWS load balancer controller. Because we also still want to be able to use the CLI to interact with the API via our domain, it is necessary to create an additional service resource, that will handle the GRPC traffic to the ArgoCD Pod.
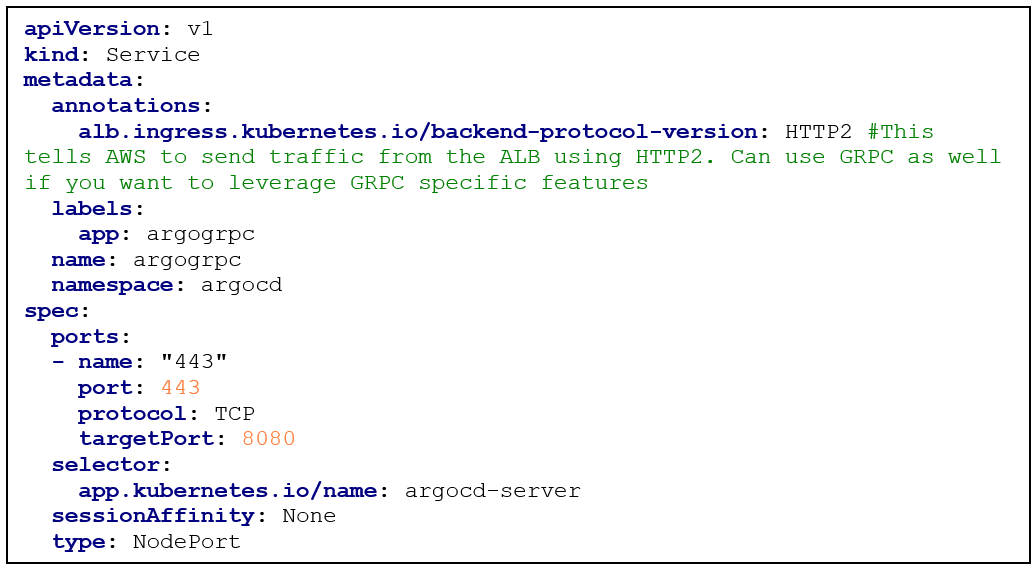
After the second service for the ArgoCD server is created (the first one was deployed via the install.yaml file), we can deploy the Ingress resource:
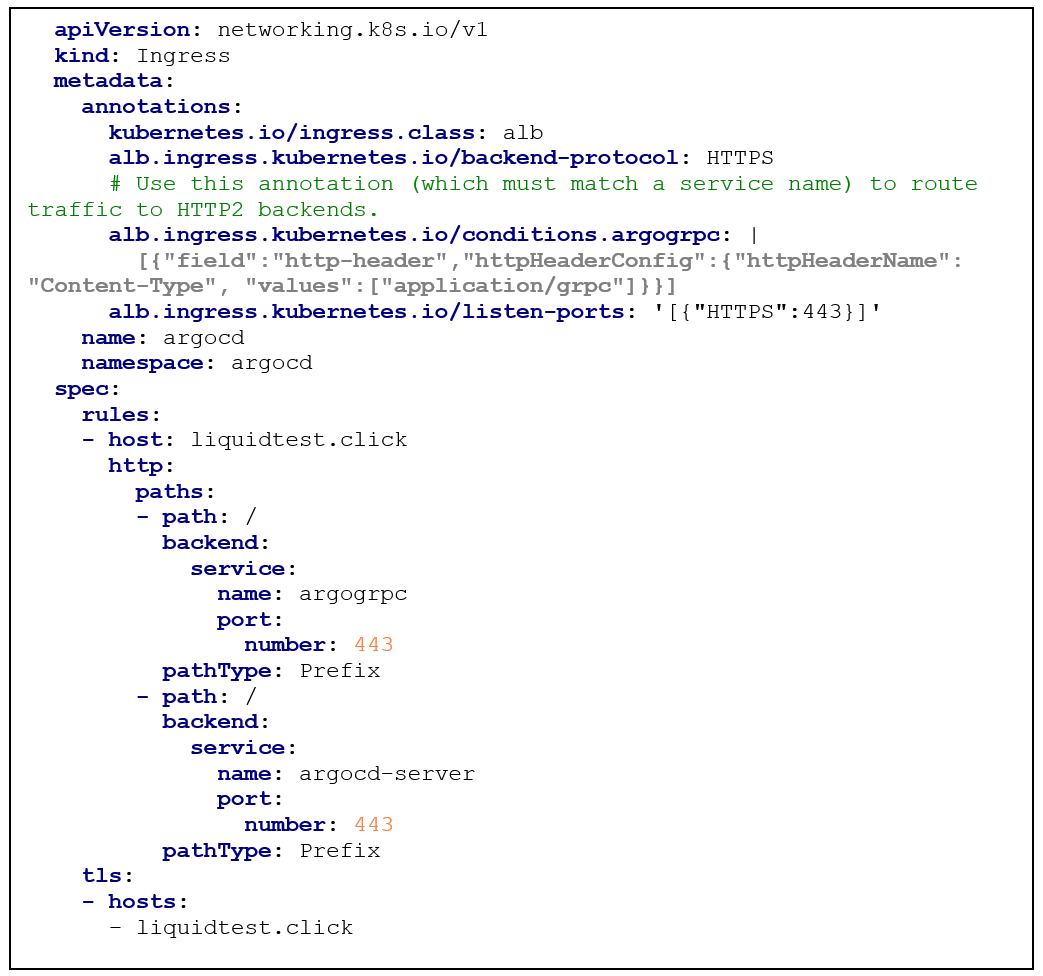
In my case, the Kubernetes AWS load balancer controller was only recognizing the Ingress resource if the annotation “kubernetes.io/ingress.class: alb” was defined. The values of the keys “spec.rules[].host” and “spec.tls[].hosts[]” need to be defined with the name of the domain you own and want to use for ArgoCD. This also defines the name of the used certificate that needs to be valid and in place in AWS ACM.

After the Ingress resource is deployed, you should see the assigned LBs FQDN in the ADDRESS column:

To be able to reach your ArgoCD server via your domain (in my case liquidtest.click), you need to create an alias record on your AWS Route53 DNS.
If this step is also done, you should be able to reach your ArgoCD via your domain:

Preparation done, congratulations! 😊
Setup Azure Active Directory
Because the Azure AD part is well described in the official ArgoCD documentation, please follow these steps to configure it.
Setup ArgoCD to use Azure AD via OIDC
First, we need to tell ArgoCD that it will provide OIDC SSO login and where it reaches the provider to get the JWT tokens for the login. For this, we need to add some lines to the “argocd-cm” Configmap:
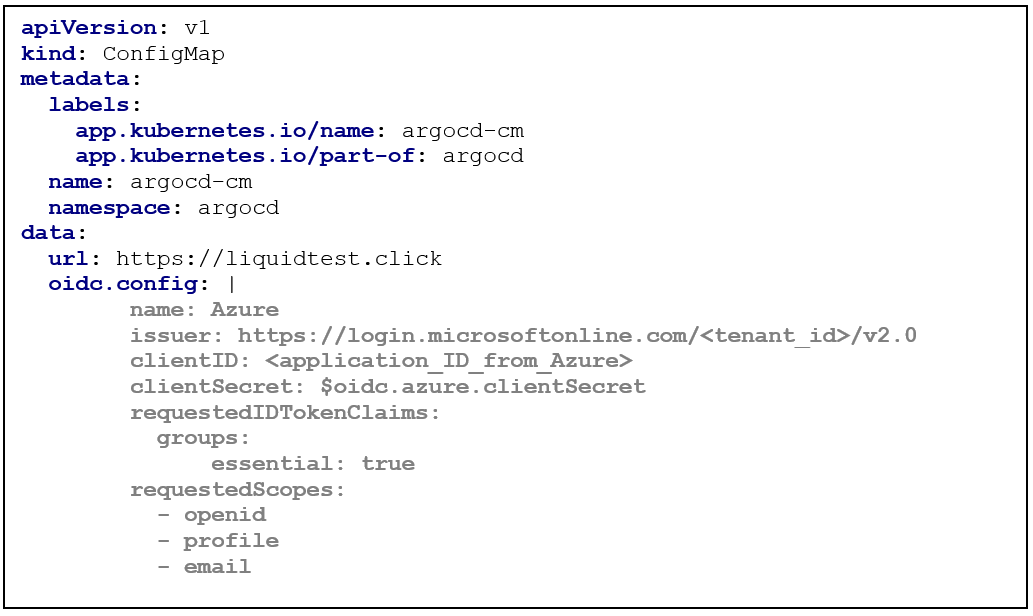
We will create the mentioned Secret in the next steps. As you can see, the groups claim is essential for ArgoCD to receive in the token. This is because there will be a RBAC (Role Base Access Control) mapping of the AAD groups to the groups that are used in ArgoCD context.
Second, we will proceed with the configuration of the client Secret in the “argocd-secret” Secret resource:

Encode the client secret from the previous step “Setup Azure Active Directory” into a base64 value and paste it into the field “data.oidc.azure.clientSecret”. This value will be used to authorize ArgoCD to interact as a OIDC RP against AAD.
Finally, we take care about the mentioned RBAC mapping. This is done via the “argocd-rbac-cm” Configmap:
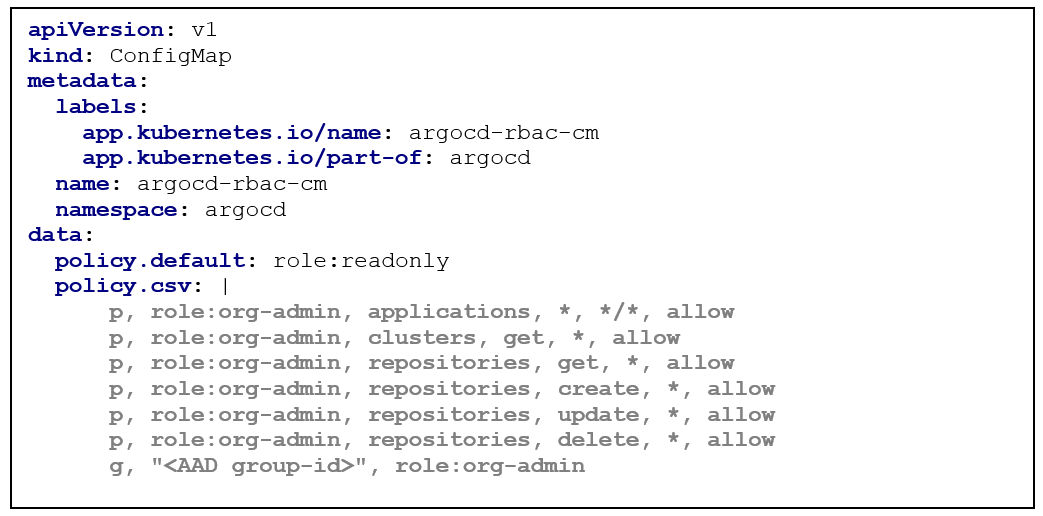
Lets take a closer look:
data.policy.csv: In this section you can define fine granular permissions for specific user groups, that you can map to an external group id received by the OIDC JWT token. More information about the configuration can be found here.
In this case;
- g, "<AAD_group_id>", role:org-admin
the AAD group is mapped to the role org-admin.
and has the following permissions:
- p, role:org-admin, applications, *, */*, allow
full control (*) of all (*) the applications (applications) in every project (*). - p, role:org-admin, clusters, get, *, allow
receive (get) cluster information (clusters) from all cluster objects (*) - p, role:org-admin, repositories, get, *, allow
receive (get) repository information (repositories) of all repository objects (*) - p, role:org-admin, repositories, create, *, allow
add (create) repositories (repositories) to all projects (*) - p, role:org-admin, repositories, update, *, allow
modify (update) repository information (repositories) on all repository objects (*) - p, role:org-admin, repositories, delete, *, allow
remove (delete) repositories (repositories) from all projects (*)
data.policy.default: This role will be assigned to user, that logged into ArgoCD and are not member of a AAD group that is explicit specified in the data. policy.csv section.
If all resources are in place, restart the ArgoCD server Pod by deleting it or scaling the Deployment. After it is up again, you should now see a button “LOG IN VIA AZURE” on your login page:
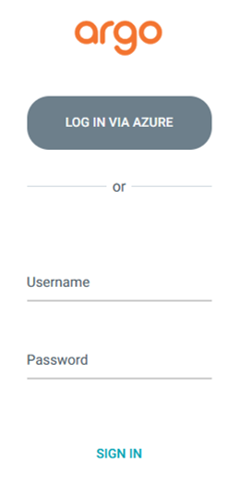
Hint: If you want to have a clean loginpage without the login form, just disable the ArgoCD admin user.
Click on the button and login with your AD credentials. If the login was successful, you can check the logged in account by navigating to “User Info” on the left side.

Tada, OIDC is integrated and you can now use your SSO also to login to your ArgoCD Deployment! 😊
Source
https://auth0.com/de/intro-to-iam/what-is-openid-connect-oidc
https://learn.microsoft.com/de-de/azure/active-directory/fundamentals/auth-oidc